I have to admit, I was a little nervous to teach this class. Would a bunch of preschoolers allow me to limit them to one color? Would they find monochromatic art to be completely boring?? I knew an added challenge would be that many kids are still learning the names of colors. What happens when I throw two shades of yellow at them and name them both yellow? Will I completely confuse these children? In the end, this was one of my favorite classes and their artwork turned out STUNNING. I was so sad when they took their art home. I wanted to hang their work in the studio and never let it go.
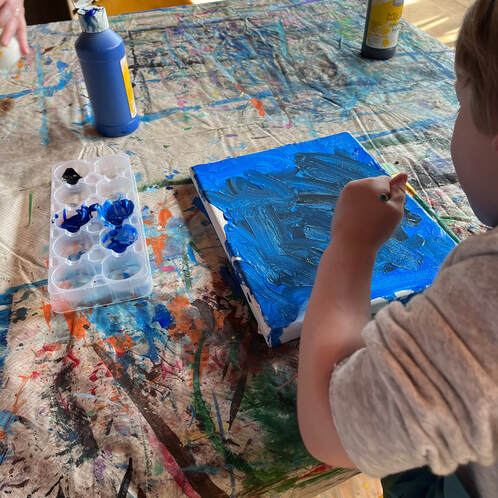
 When planning our opening activities, I made sure to keep the developmental differences among the children in mind. I knew the four-year and older kids would be ready to find the differences between color values. I presented them with paint chip strips and clothes pins with matching colors. Students were challenged to match the clothes pin to the correct color strip. It proved to be a puzzle, but was solved by several students. For the younger students in class, we continued building their understanding of colors through several color sorting activities. To launch us into our project, we did a picture walk through 'My Favorite Color' by Aaron Becker. This is a gorgeous board book that offers a spectrum of hues. It was the perfect book to start a conversation about Value. Each page has translucent windows of color in various tints and shades. I would remark, "What color is on this page?" And the kids would remark, "Green!" I would say, "Yes, they are all green, but they don't all look the same." Then we went through the hues and gave them names. "This looks like spring grass. How about we name it Spring Grass Green?" The kids were excited to come up with creative names and the exercise helped them see the differences within color value. Then came the hardest part. I asked kids to pick a color they like at that moment and asked them to keep working with just that color for the duration of the project. It was a tall order and some kids needed reminders, but to my relief, the kids were not very bothered by the restriction. Each student started with a blank canvas and a squirt of their favorite color. I asked students to try to completely cover their canvas. As they worked, I came by and added more of the same color, along with a large squirt of white. And after more time, I added a small dot of black paint. The white and black paint naturally mixed on the canvas, creating unique blends of tints and shades. There was a lot of "aha!" moments. One little girl was excited to discover pink could be made from red. Once canvases were completely coated in paint, I pulled out collage supplies. I told students they could choose any material and place it anywhere, but remember to keep to the same color. Students had so much fun selecting collage materials. Of course, the glitter was hugely popular. I enjoyed watching how each child chose to arrange the materials on their canvas. Even though our focus was all about the process of our work and how it helps us understand color value, we also ended up with a gorgeous work of art that I would gladly display.
0 Comments
Space...the final frontier. 
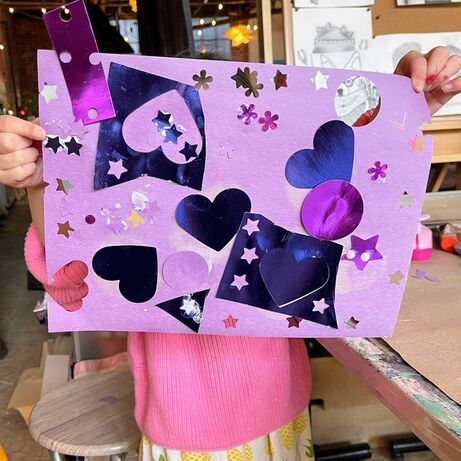
No, no, not that kind of space. When we talk about "space" as part of the elements of design, we are talking about the use of visual area in an art piece. The idea of "space" can be pretty complex in meaning and by no means an easy thing to teach young children. So without trying to verbally teach anything, my goal in this class was to take this abstract idea and make it tangible. When we create art, we can choose to fill a space, or we can choose to make open space. We translated that idea through our beginning activities. When children arrived, a variety of sensory bins were laid out for them, with containers ready to be filled and dumped, a popular activity for this age group. Another activity option was to make space by hammering holes into cardboard using golf tees and a mallet. Some of the kids weren't sure I was serious when I told them they had permission to hammer holes but they were soon happily banging away on the boxes. Before we moved on to our main activity stations, I gave each child a scarf and invited them to move throughout the studio space. "How can we use as much space as possible?" "How can we use the least amount of space?" "Can we use just one side of the room and keep the other side empty?" "Hey! you look smaller because you are so far away!" Moving with scarves was a fantastic opportunity to get our wiggles out and understand the area around ourselves. In our main activity stations, I wanted to build upon the interest in the craft punches I saw in the previous class on "shape." Instead of just using the positive shape the craft punches stamp out, I asked kids to also use the paper with the negative shape left behind. I absolutely love how the positive and negative shapes interacted on the page. Our second station also made use of positive and negative space. When I planned on using stencils for class, I figured kids would enjoy them, but I had no idea this station would be so popular. We had to rearrange the station several times to fit everyone in. Some students chose to sponge paint their stencils. Others chose the dry-quick option of tempera paint sticks. Both options had vibrant results. At our third station, I wanted to create a new painting experience for students by restricting the range of their paint brushes. Students were challenged to paint their pictures through the holes of various crates. The limitations of movement didn't limit the amount of fun. Some students stayed at this station to make several works of art. This class was so much fun for me to teach. It was an energetic class full of color and joy. Space as an element of design is super abstract, but student's understanding of it expanded through concrete application. These experiences will help build student's foundational knowledge for when they discuss space as an abstract concept when they are older.
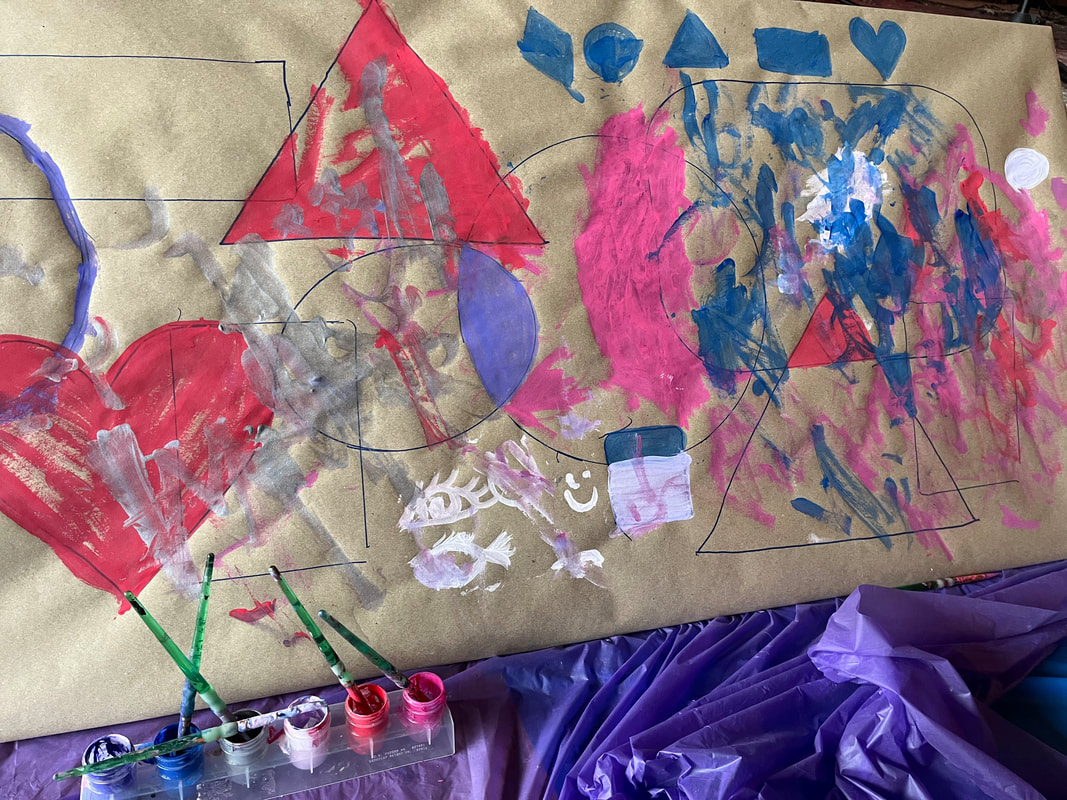
Shape is a familiar concept to young children. Us parents and teachers are often quizzing the kids in our lives, "What shape is this?" The familiarity of the subject made it easy for students to quickly engage and remained focused in our Elements of Design class. We began class playing with shapes that we could explore with our hands - MagnaBlocks, wood blocks, Duplos, pattern blocks, and GeoBoards. Young students learn best when moving, touching, and doing. One little girl jumped up from her work and announced, "Hey! Two triangles make a diamond!" She would not have learned that from me telling her. She needed to discover it. I often like to set-up my Mini Makers classes with stations. This allows kids to flow where their interest is and spend as much or as little time as they want on a project. I find there are some children who are very detail-oriented and will spend an entire class on one project. Then there are other kids who are always on the move and like to sample many projects. One project in our shape focused class was creating shape collages. I offered some pre-cut shapes from the supply shelf, but the magic of this station was in the craft paper punches. A couple of boys spent a solid twenty minutes solely punching various shapes. When I asked them if they would like to glue any of the shapes onto a background, they replied they were happy to continue punching more shapes. This is the beauty of a process art class. Those boys were not interested in creating a product they could keep. They were engaged in learning about a new art tool, knowledge they can later apply to their artwork. In my next blog post, see how we build upon their new understanding of this tool to talk about positive and negative space. At a second station, I asked kids to look for shapes in their everyday world. We used stamping as a method of capturing those shapes. In a process art class, we let creativity take us in all sort of directions. One student announced that our paint palette - a paper plate - was a circle and she wanted to paint that shape. We ran with the idea and she spent a good chunk of time filling her circle shape with color. We want the art studio to be a place that fosters experimentation and ideas beyond what is already planned. Our third station was a collaborative piece. I had pre-drawn various open geometric shapes on large butcher paper and taped it to a board. I propped the board up on the floor like an easel, making it easily accessible. It is important young children have opportunities to write or paint on various surface angles because the change in wrist movement works different muscles. Variation leads to increased muscle control. I asked students how they would choose to fill the shapes with paint. I was amazed to watch a two-year old spend the entire class at this one station, quietly painting alongside her mother. What a valuable bonding experience!
What is a line? It's simply a moving dot. Movement is also the best way children engage with the world. Our class focusing on Line began with several immersive activities where students became the moving dots. We began with a Montessori-style activity, "Walking the Line," inviting children to use their whole body, refining balance and control. Some children used their creativity and adapted the line to become a road to drive a car. To continue our work with gross motor muscles, children were invited to pretend markers were ice skaters and to use big arm movements to "skate" across the butcher paper. A wordless book titled "Lines" by Suzy Lee provided inspiration. We also made sure to work our fine motor skills - smaller muscles that will help children grasp writing utensils and art tools. Students were invited to use their pincer fingers to build various lines with loose parts. Our last opening activity was a bit of a puzzle. Toy cars were parked at the beginning of a line. Students were challenged to drive their car through the maze, staying on the correct line and making it to the correct garage. This took some focus and sometimes a bit of teamwork. After all that movement, we were ready to sit for a bit and work on our main project. The invitation was simple - black paper, glue, and strips of bright paper. I encouraged Mini Maker's to experiment with line directions and soon we had some examples of cross-hatching. I also reminded students that sometime lines are different lengths and they aren't always straight. Children were soon tearing paper into various sizes. Once one person figured out they could glue strips on in a 3-D manner, all the students began to play with the idea. We ended class with a quick project for early finishers. Students were invited to create a line design on a small canvas with rubber bands and washi tape. Once designed, Mini Makers then applied watercolor paint over top. This watercolor resist technique revealed unpainted lines when the tape and rubber bands are later removed.
|
Archives
May 2023
Categories |